Difference between revisions of "Template:Setup Active Directory Federation Services"
| [unchecked revision] | [unchecked revision] |
Ltalaschus (talk | contribs) |
Ltalaschus (talk | contribs) |
||
| Line 89: | Line 89: | ||
[[File:Adfs_setup_12.png|center|550px]] | [[File:Adfs_setup_12.png|center|550px]] | ||
* Have the ''Client Identifier'' and the ''Redirect URI'' available and return to MailStore to proceed with the configuration of the [[Active Directory Integration|Active Directory]] or [[Generic LDAP Integration|LDAP Generic]] directory service connectors. | * Have the ''Client Identifier'' and the ''Redirect URI'' available and return to MailStore to proceed with the configuration of the [[Active Directory Integration|Active Directory]] or [[Generic LDAP Integration|LDAP Generic]] directory service connectors. | ||
| + | <noinclude> | ||
| + | [[de:Vorlage:Einrichtung_von_Active_Directory_Federation_Services]] | ||
| + | [[en:Template:Setup_Active_Directory_Federation_Services]] | ||
| + | </noinclude> | ||
Revision as of 06:56, 22 April 2021
MailStore can be configured to authenticate against Active Directory Federation Services (AD FS) when using the Active Directory or LDAP Generic directory service connectors. This guide assumes that you already have AD FS installed and configured and only describes the parts specific to MailStore.
To allow MailStore to request OIDC tokens from AD FS, you have to create an Application Group in AD FS. This Application Groups has to be referenced in MailStore to establish a trust erlationship between those two systems.
- Login to your AD FS server system.
- Open the AD FS management console.
- Navigate to Application Groups.
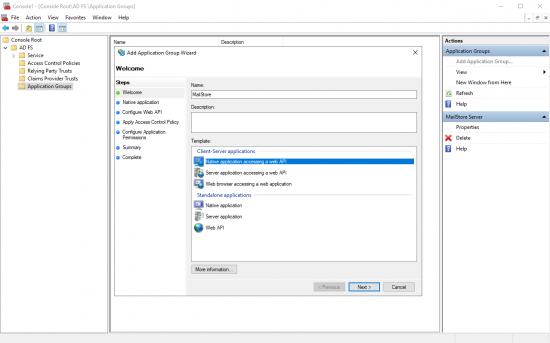
- Right click on Application Groups and select Add Application Group.. or click Add Application Group.. in the Actions pane.
- Enter a Name, e.g. MailStore, and select the template Native application acessint a web API.
- Click Next.
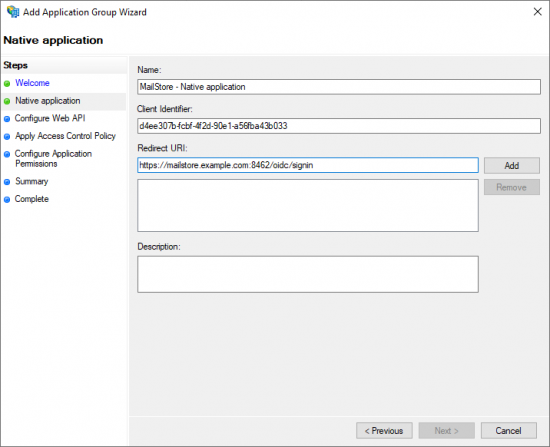
- The Client Identifier of this application group is shown. Copy its value, since it is required later in MailStore.
- In the field Redirect URI, enter a URI in the format (without brackets)
https://<fqdn>[:<port>]/oidc/signin- with the following components:
- https://
Specifying thehttps://protocol is obligatory. To avoid certificate warnings during user logon, the web browsers on the client machines must trust the certificate used by MailStore Server. - FQDN
The Fully Qualified Domain Name (FQDN) of your MailStore Server that consists of the machine name and the DNS domain, e.g.mailstore.example.com. This name must be resolvable by all clients from which users shall be able to log on to MailStore Server. - Port
The TCP port of the MailStore Web Access (8462by default). This value must be equal to the port configured in the section Base Configuration > Network Settings > MailStore Web Access / Outlook Add-in (HTTPS) of the MailStore Server Service Configuration. The TCP port has to be specified only if it is different from the default port of the HTTPS protocol (443). - /oidc/signin
The endpoint where MailStore Server expects the authentication responses of Azure AD. This path has to be specified exactly as stated here at the end of the redirect URI.
Examples for valid redirect URIs Product Machine Name DNS Domain TCP Port Resulting Redirect URI MailStore Server mailstore example.com 8462 https://mailstore.example.com:8462/oidc/signin
Redirect URI with Fully Qualified Domain Name and MailStore Web Access default portMailStore Server mailstore example.com 443 https://mailstore.example.com/oidc/signin
The port can be ommited if the HTTPS default port 443 has been configured for MailStore Web Access or as source port of a port-forwarding on the firewall or router.MailStore SPE archive example.com 443 https://archive.example.com/<instanceid>/oidc/signin
The instanceid of the instance is part of the Redirect URI.
- Copy the Redirect URI into the clipboard.
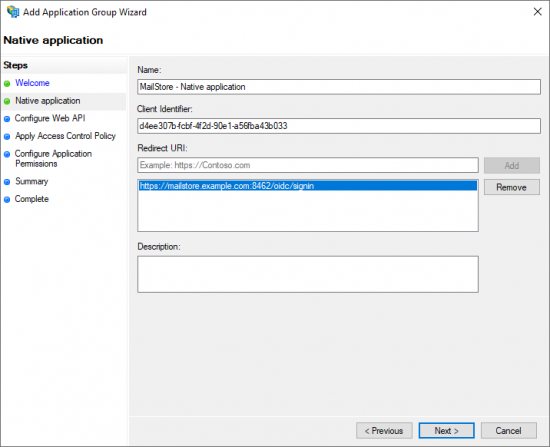
- Click Add to add the Redirect URI to the list of allowed URIs.
- Click Next to continue.
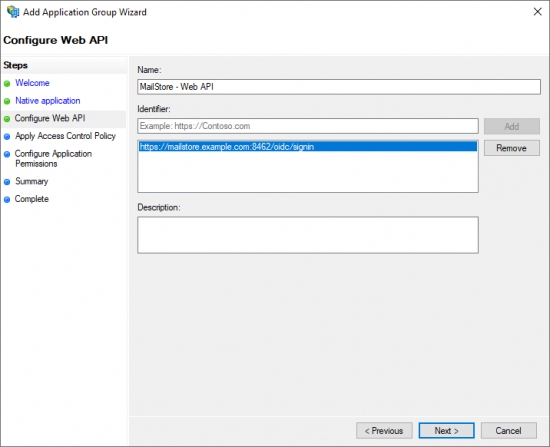
- Paste the Redirect URI into the Identifier field of the Web API configuration.
- Click Add.
- Click Next to continue.
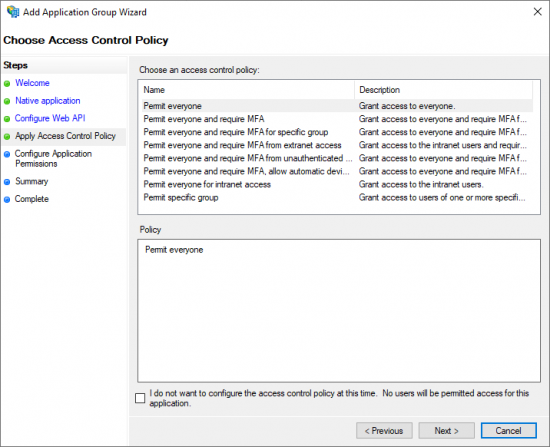
- Choose an Access Control Policy for this Application Group.
- Click Next to continue.
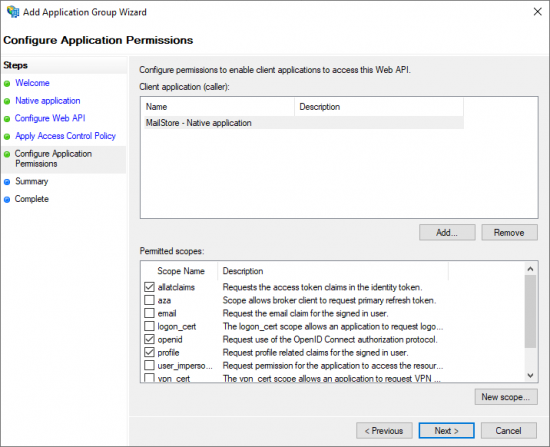
- Select the scopes allatclaims, openid and profile.
- Click Next to continue.
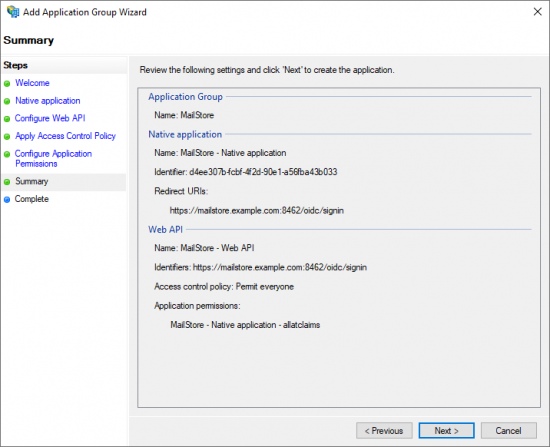
- A summary of the configuration is shown.
- Click next to create the Application Group.
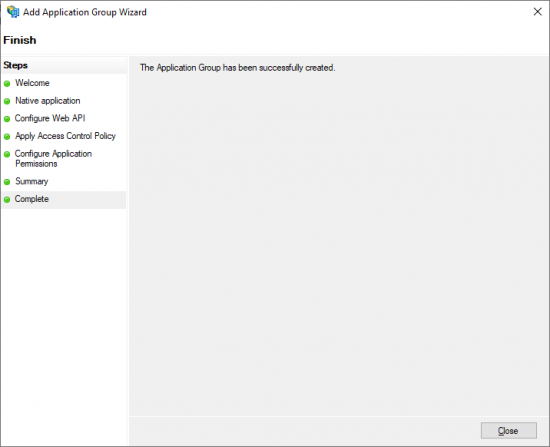
- A success message is shown.
- Close the dialog.
Optional: sAMAccountName as user name
The OIDC token issued by AD FS does not include the sAMAccountName property of the users by default. If you have configured MailStore to use the sAMAccountName as user user name, then you have to configure the AD FS application group to include that property in the token, otherwise MailStore is unable to associate the token with a user and the users are unable to login.
If you have configured MailStore to use the user principal name (UPN) or the local part of the user principal name, then these configuration steps are not required.
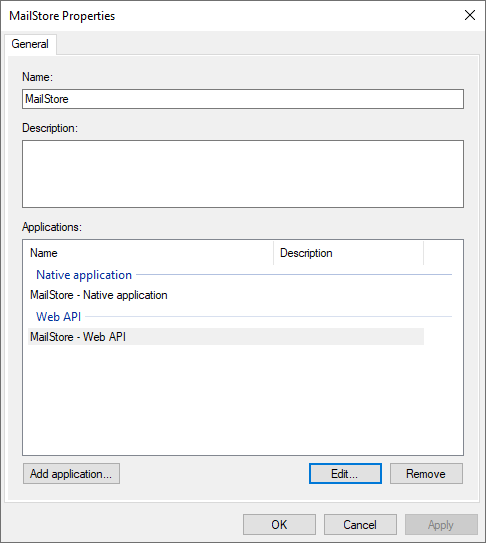
- Right click on the newly created Application Group and select Properties.
- Select the Web API application and click Edit....
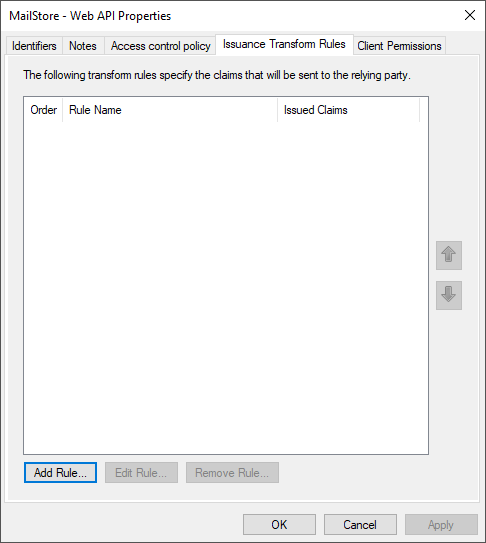
- Open the tab Issuance Transform Rule.
- Click Add Rule....
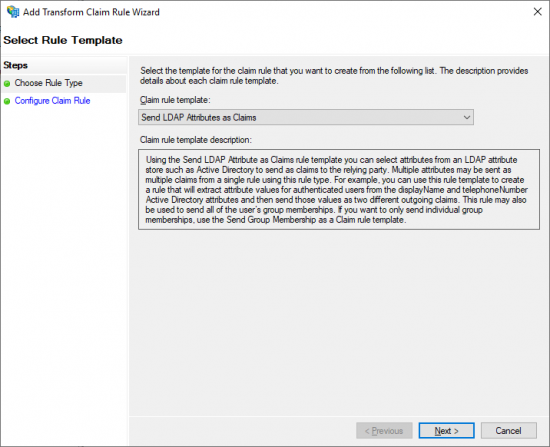
- Select Send LDAP Attribute as Claims from the Claim rule template drop down menu.
- Click Next to continue.
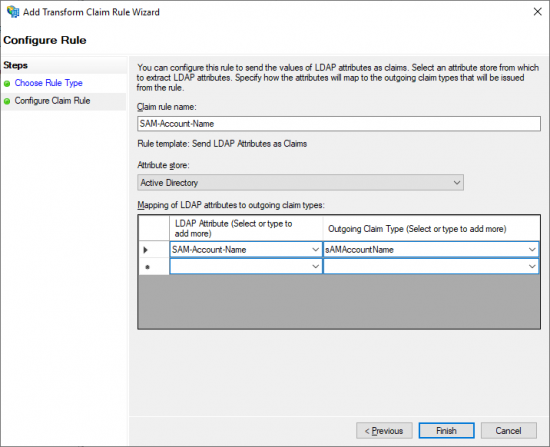
- Enter a Claim rule name.
- Select Active Directory from the Attribute store drop down menu.
- Select SAM-Account-Name in the LDAP Atrribute column of the mapping table.
- Enter sAMAccountName in the Outgoing Claim Type column.
- Click Finish.
- Have the Client Identifier and the Redirect URI available and return to MailStore to proceed with the configuration of the Active Directory or LDAP Generic directory service connectors.
