Creating Instances
Revision as of 14:28, 27 March 2017 by Ltalaschus (talk | contribs)
To create new instances for customers follow these steps:
- Log on to the Management Console, if not already logged on.
- Click on General > Instances.
- Click Create Instance.
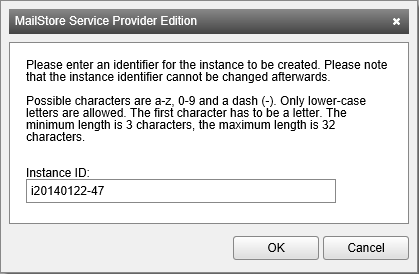
- Enter a unique Instance ID.
- Hint: It is not necessary to choose a meaningful instance ID, as an alias name can define in the next step. The instance ID could for example be a customer number or any other unique identifier from a CRM system.
- Click OK.
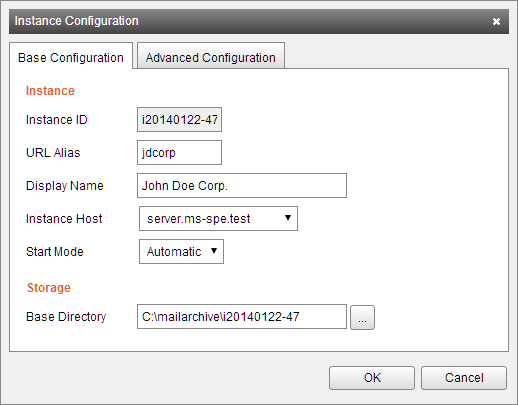
- Fill out the Instance Configuration form:
- Tab: Base Configuration
- URL Alias Meaningful unique alias name that can be used as an alternative to the instance ID.
- Display Name: Additional identification information for the instance, e.g. customer name.
- Instance Host: Instance Host on which the new instance gets created.
- Start Mode: Defines how the instance is started. Choose from the following options (Default: Automatic):
- Disabled: The instance can neither be started automatically nor manually.
- Manual: The instance can only be started manually.
- Automatic: The instance will automatically be started with the Instance. Host.
- Base Directory: Directory where instance's data will be stored.
- Tab: Advanced Configuration
- Enable VSS Writer: Enable support for Volume Shadow Service.
- Exclude Indexes from VSS Backup: Excludes the unencrypted search index files from the backup set reported by the VSS writer.
- Please note: This option can be set, so that administrator which have access to the backup files cannot access the unencrypted search index files. When restoring backups that do not include search index files, the search indexes have to be rebuild.
- Exclude Indexes from VSS Backup: Excludes the unencrypted search index files from the backup set reported by the VSS writer.
- Enable Debug Log: Enable debug logging for the instance.
- Enable IMAP Server Connection Log: Enable IMAP Server connection logging for the instance.
- Enable VSS Writer: Enable support for Volume Shadow Service.
- Click OK to create the instance.
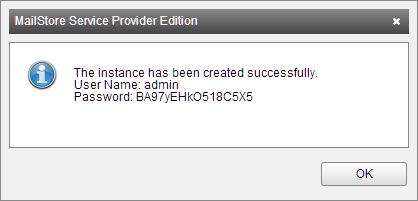
- MailStore Service Provider Edition will now create the new instance and displays the login credential for afterwards.
- If the end customer should be able to administrate the newly created MailStore Server instance on his own, these credentials must be made available to him. Otherwise it is not necessary to save these credentials.
- Click OK to finish.
Irrespective of the configured Start Mode, the newly created instance must be started manually before it can be used. Read more about starting, stopping and restarting of instances in the next section.


