Difference between revisions of "Archiving Emails from Kerio Connect"
| [unchecked revision] | [unchecked revision] |
| Line 29: | Line 29: | ||
* [[Wikipedia:en:Kerio Connect|Wikipedia: Kerio Connect]] | * [[Wikipedia:en:Kerio Connect|Wikipedia: Kerio Connect]] | ||
| − | [[de: | + | [[de:E-Mail-Archivierung von Kerio Connect]] |
Revision as of 12:07, 14 June 2010
Archiving Incoming and Outgoing Emails Directly
Kerio offers an easy way to send copies of all incomming and outgoing emails to a dedicated archiving mailbox. This mailbox can be used as an archiving source for MailStore's "IMAP Multidrop" archiving profile.
Step 1: Set up archiving
- Go to Configuration | Archiving and Backup
- Open the tab Archiving
- Activate Enable mail archiving by selecting the appropriate option
- Enable the "Archive to remote email address" function and enter the email address of the archiving mailbox, e.g. [email protected]
- Enable all four options in the archiving section (Local messages, Incoming messages, Outgoing messages, Relayed messages)
Step 2: Deleting successfully archived emails
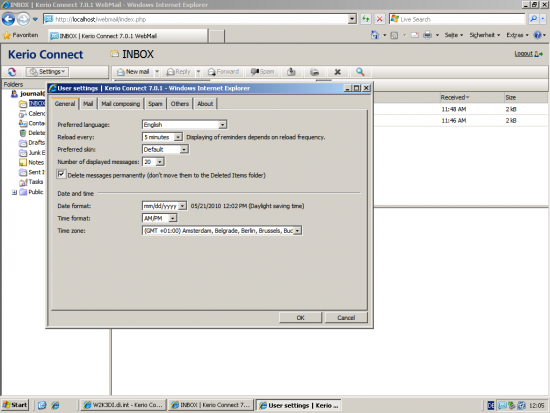
By default Kerio's IMAP server moves all emails marked as deleted into the sub folder "Deletes Objects". This means, that all emails successfully archived and marked for deletion by MailStore Server will also be moved into the "Deletes Objects" subfolder. To prevent this behavior and really purge all succesfully archived mails from the archiving mailbox, follow these few steps:
- open your webbrowser and navigate to the webmail client of your Kerio server
- log on to the user of the archive mailbox
- open the settings section
- choose the general tab
- enable the option "Delete messages permanently (don't move them to the Deleted Items folder)"

